Asphalt shingle roofing remains the most popular choice for residential properties across the country, combining affordability, durability, and aesthetic versatility in a proven roofing solution. While homeowners might appreciate the finished appearance of a new asphalt roof, the installation process itself involves far more complexity than simply laying shingles across a roof deck.
Understanding the methods, materials, and critical steps involved in Asphalt Roof Installation Helena helps property owners make informed decisions and appreciate the craftsmanship required to create roofs that protect homes reliably for decades. From initial preparation through final cleanup, each phase of installation contributes to the overall performance and longevity of this essential protective barrier.
Preparation and Planning for Success
Successful asphalt roof installation begins long before the first shingle is laid. The preparation phase establishes the foundation for everything that follows, determining whether the finished roof performs as intended or develops premature problems. Professional installers start by thoroughly inspecting the existing roof structure, examining not just the old roofing materials but also the underlying decking, framing, and structural components that support the entire system.
This inspection identifies any structural issues requiring attention before new roofing can be installed. Sagging areas might indicate insufficient support or water damage that has weakened framing members. Soft spots in the roof deck suggest rot or deterioration that must be addressed. Without correcting these underlying problems, even perfectly installed new shingles will fail prematurely as the compromised structure beneath them continues to deteriorate.
Material selection and ordering represent another crucial preparation step. While all asphalt shingles share basic characteristics, significant variations exist in quality, weight, color, texture, and performance features. Three-tab shingles offer basic protection at economical prices, while architectural or dimensional shingles provide enhanced durability, better wind resistance, and more attractive appearances that mimic the look of more expensive roofing materials. Property owners must decide which characteristics matter most given their budget, climate conditions, and aesthetic preferences.
Calculating material quantities requires precision to ensure adequate supplies arrive without excessive waste. Experienced installers account for roof pitch, complexity, waste factors from cutting and fitting, and extra materials needed for starter strips, ridge caps, and potential repairs. Weather monitoring also factors into planning, as asphalt shingle installation requires specific temperature ranges and dry conditions for proper adhesive activation and sealing.
Removing Old Roofing and Preparing the Deck
Most asphalt roof installations involve removing existing roofing materials before installing new shingles, though some situations allow for installing new shingles over one layer of existing asphalt shingles. Complete removal provides opportunities to inspect and repair decking while eliminating the added weight of multiple roofing layers. The tear-off process generates substantial debris that must be managed carefully to protect property and ensure thorough cleanup.
Professional crews work systematically across the roof, removing old shingles, underlayment, flashing, and fasteners. They inspect the exposed decking as work progresses, marking damaged areas for repair or replacement. Rotted or deteriorated decking sections must be cut out and replaced with new material properly fastened to roof framing. Even small compromised areas can allow water infiltration, so thorough inspection and complete repairs prove essential.
After old materials are removed and decking repairs completed, the bare roof deck receives a final inspection and cleaning. Any protruding nails are removed or driven flush, and the surface is swept clean of debris that could interfere with underlayment installation or create bumps visible through finished roofing. Edge metal or drip edge is typically installed at this stage, providing a clean finished edge and directing water away from fascia boards and into gutters.
Installing Underlayment and Ice Barriers
Underlayment creates a secondary weather barrier beneath finish roofing materials, providing critical protection against wind-driven rain and serving as temporary waterproofing if shingles are damaged or blown off. Modern synthetic underlayments have largely replaced traditional felt paper, offering superior tear resistance, better water protection, and increased stability during installation and in the finished assembly.
Installation begins at the eaves, with underlayment rolled horizontally across the roof with appropriate overlap at seams. Fasteners secure the material at intervals specified by the manufacturer, holding it firmly in place without excessive penetrations that could compromise its weather-resistant properties. Each successive course overlaps the one below, creating a shingled effect that directs any water that penetrates the finish roofing downward and off the roof.
Ice and water shield represents a specialized self-adhering underlayment installed in vulnerable areas including eaves, valleys, and around roof penetrations. This rubberized membrane creates a waterproof barrier particularly important in regions experiencing ice damming, where melting snow can back up under shingles and penetrate conventional underlayment. The self-sealing properties also provide superior protection around nail penetrations, reducing leak potential at these vulnerable points.
Proper underlayment installation might seem like a minor detail hidden beneath visible roofing, but it significantly impacts long-term roof performance. Wrinkles, gaps, or inadequate fastening can allow water penetration, while properly installed underlayment provides backup protection that prevents minor shingle problems from becoming interior water damage.
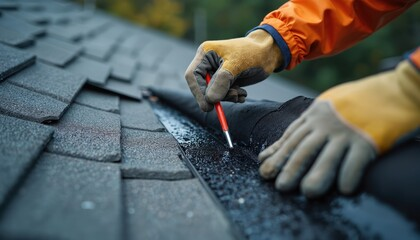
Shingle Installation Techniques and Standards
Asphalt shingle installation follows specific patterns and techniques designed to ensure proper weather protection, adequate adhesion, and uniform appearance. Work typically begins at the eaves with a starter course providing a solid foundation for the first full row of shingles. The starter course ensures proper overhang at the eaves while creating a sealed edge that prevents wind-driven rain from penetrating beneath shingle edges.
Full shingle courses are installed in staggered patterns that prevent alignment of joints between adjacent rows. This offset pattern ensures water flowing down the roof encounters overlapping shingle edges rather than channels where adjacent shingles meet. The specific offset pattern varies depending on shingle style, but maintaining consistent patterns across the entire roof proves critical for both performance and appearance.
Fastening represents one of the most critical aspects of shingle installation, directly impacting wind resistance and longevity. Each shingle requires a specific number of nails placed in designated locations according to manufacturer specifications. Nails driven too high fail to penetrate the overlapping shingle above, reducing wind resistance. Nails placed too low create visible penetrations and potential leak points. Overdriven nails tear through shingles, while underdriven nails leave fastener heads protruding where they can damage overlapping shingles.
Ridge caps require special attention as they cover the peak where roof planes meet. These specialized shingles bend over the ridge, protecting this vulnerable transition while creating an attractive finished appearance. Proper fastening and adequate adhesive activation ensure ridge caps remain secure even in high winds that create uplift forces particularly strong at roof peaks.
Flashing, Ventilation, and Finishing Details
Flashing installation around chimneys, skylights, vent pipes, and other roof penetrations demands precision and expertise. These transitions between roofing and other elements represent the most common locations for roof leaks, making proper flashing installation critical. Counter flashing, step flashing, and boot flashing each serve specific purposes, and experienced installers understand which types work best in different applications and how to install them for reliable weather protection.
Valley flashing deserves particular attention as valleys channel large volumes of water flowing from multiple roof planes. Open valley systems use metal flashing with shingles cut to create a visible metal channel, while closed valleys overlap shingles from adjacent roof planes. Each method has advantages, and proper installation prevents the valley leaks that can cause extensive water damage.
Adequate ventilation contributes significantly to roof longevity by moderating attic temperatures and preventing moisture accumulation. Ridge vents provide exhaust for hot air rising in attics, while soffit or eave vents allow cool air intake. This balanced ventilation system reduces shingle temperature extremes that accelerate aging while preventing condensation that can rot decking and framing. Many quality roof installations include ventilation improvements even when existing systems seem adequate, recognizing the long-term benefits proper airflow provides.
Final details including boot sealing around vent pipes, ensuring proper clearances around chimneys, and verifying complete adhesive activation on all shingles complete the installation. Thorough cleanup removes all debris, nails, and shingle fragments that could damage property or create hazards. Magnetic rollers sweep areas around the house, picking up nails that might otherwise puncture tires or injure people or pets.
Final Thoughts
Asphalt roof installation combines time-tested methods with modern materials to create protective systems that serve homes reliably for decades when properly installed. While the finished product might appear straightforward, achieving that result requires extensive knowledge, careful attention to countless details, and adherence to proven installation standards. From structural preparation through final cleanup, each step contributes to overall performance and longevity.
Property owners investing in new asphalt roofing should understand that installation quality matters as much as material selection, and choosing experienced professionals who follow best practices ensures the substantial investment in a new roof delivers the protection and peace of mind that proper roofing makes possible.
A well-installed asphalt roof provides not just weather protection but also energy efficiency, enhanced property value, and the confidence that comes from knowing your home is properly protected against whatever weather conditions arise.